Showing posts with label Really Easy. Show all posts

Wednesday, 2 May 2012

Thai prawn, ginger and spring onion stir-fry

Stir-fry is a great dish when you are really hungry but want something really quick AND healthy.  This stir-fry takes a little bit more time to prepare than others because of preparing the sauce, but it's still ready in less time than it takes to have a takeaway delivered and its a lot tastier too.  I came across this recipe on BBC good food - my favourite foodie site.  I have slightly adapted the recipe/method from the original as my other half isn't keen on coriander so the whole bunch suggested would have ruined it for him.  As it is, the amount I put in complimented the other flavours rather than overpowering it.  Coriander is one of those ingredients you either love or hate..like marmite, but it goes so well in this dish that I would feel confident in saying that even those who don't like coriander would have to agree that its pretty darn tasty! And for those who do like their coriander..sprinkle a bit more over the top at the end like I did.


We tend to have our stir-fry's with loads of vegetables and no rice or noodles.  For those on Weight Watchers this is 5 pro points per serving and the recipe serves two.  Add extra points for rice or noodles.  To make the dish you'll need the following:

  • 200g of raw tiger or king prawns
  • 1 chilli, de-seeded and chopped
  • 2 garlic cloves, roughly chopped
  • Fresh coriander - I used about a tablespoon once chopped, add more if you both like coriander
  • Juice of half a lime
  • 2 tablespoons fish sauce (don't smell it before hand!!)
  • 1 tablespoon soy sauce
  • 1 tablespoon of olive oil 
  • 1 teaspoon ginger
  • 4 spring onions, chopped
  • stir fry vegetables of your choice - e.g. beansprouts, water chestnuts, bamboo, sweetcorn etc

To make the sauce, put the chilli, garlic, coriander, lime juice, sugar, fish sauce, soy sauce, olive oil and ginger into a mortar and crush/mix all the ingredients with a pestle.  Alternatively if you don't have a mortar and pestle you can use a food processor.  

Put the prawns in a bowl and add about 2 tablespoons of the sauce then leave it to marinade for a few minutes whilst you prepare your chosen vegetables.  

Add the prawns and the vegetables to a wok or a pan with the remaining sauce and fry until the prawns are cooked.  

In the words of Gordon...done!

Sunday, 22 January 2012

Delicious Beef Stir fry

I've only just started to eat Chinese food recently, it's never been a cuisine that's appealed to me but I'm starting to be more adventurous and trying a few different dishes to ease me in.  Maybe it was all the greasy looking, really sweet smelling dishes that I've seen people eat from the takeaway and the number of people that have complained about getting ill after eating one! 


On Christmas Eve my mam rustled up a lovely beef stir fry in her new wok for us and it was so delicious that I had to get the recipe.  Thing is my mam just chucked some stuff in a bowl and made it up but there was a very similar recipe in the Ken Hom stir fry cookbook that Santa brought her the next day so she sent me the recipe, although I've changed it slightly.


The key here is marinating the beef before stir frying it.  The longer you can leave it to marinate the better but if you haven't got time to let the flavours soak in you can use it straight away.  Now if I had smelt the oyster sauce used in marinating the beef I don't think I would have touched it, but it does make it taste really nice.


For those of you on Weight Watchers the stir fry itself is 5 ProPoints but if you are having it with rice or noodles then it'll be extra.


The recipe below serves two but just add extra beef and veg if you are serving more.


To make the stir fry you will need:

  • Steak cut into strips - I used rump steak but you could use sirloin or fillet.  I'm not sure how much steak was used as I just asked the butcher for enough for two people, but I'm guessing about 250g
  • Vegetables - it's up to you what you use, this particular time I used peppers, pak choi, onion, peppers, spinach, peas, beansprouts, carrots and broccoli because that's what I had in the fridge.  Again there isn't a specific measurement for this I just cut up what I estimated to be a good amount for two people.
  • 1 tbsp sweet chilli sauce - alternatively you can use a fresh chilli and a pinch of sugar
  • 1 and a half tablespoons of oyster sauce
  • 1 tsp of light soy sauce
  • 1 large clove of garlic, grated
  • 1 tsp of fresh grated ginger
  • 1 tbsp of rice wine vinegar (you could use dry sherry as an alternative)
  • Black pepper
1) Marinade the beef in the garlic, ginger, sweet chilli sauce, oyster sauce, rice wine vinegar and soy sauce.  Add a bit of black pepper to season.  You could add salt if you wish but I found it was salty enough with the soy sauce.  I kept mine in the fridge for a couple of hours whilst it marinated, but be warned my fridge still stinks of chilli and garlic 24 hours later!


2) When you want the stir fry, remove the beef from the fridge and let it come to room temperature.  Fry in a large pan or a wok if you have one for a few minutes on a high heat.  Once the beef is cooked you can either remove from the pan and set aside and then stir fry the vegetables in the juices left over from the beef or you can chuck it all in together, which is the method I went for! Add this stage you may also want to add more oyster, chilli or soy sauce - it's dependent on your tastes.  Again stir fry for a couple of minutes on a high heat so the veg is still crunchy.

3) Serve on its own or with some rice or noodles.  All ready in a flash!

My boyfriend calls it a Triumph!! I say its absolutely delicious..but my mam's still had the edge! :-)


Tuesday, 3 January 2012

Butterfly cakes

Because my Grandma was, and my mum is very good at making cakes, scones, etc I thought it was about time I got more in to baking to carry on the tradition, and so that when I have children I can teach them how to bake.  I've been inspired by the Great British bake off and thanks to Mary Berry I now make totally gorgeous butterfly cakes..well you have to start somewhere! So here is the foolproof recipe for making beautiful butterfly cakes that you can make with your kids or just when you fancy a little bit of a treat.  

The recipe makes 12 butterfly cakes and if your doing weight watchers then that is equivalent to 7 pro points each...seems a lot but just have one and feed the rest to your friends and family.  They are totally worth 7 points though!  

Before I tell you the recipe though there are a couple of things that I think have made all the difference to these butterfly cakes and ones I have made before although it could also be because it is a better recipe.  Firstly I used Lurpak butter - its rich and creamy and you can really taste it in the cakes ...not so good if you don't like Lurpak but I love it! Secondly I used silicone cupcake molds in a cupcake tray - I have found that the cakes are more moist with silicone cases than paper ones, and they are still really moist three days later! 

To make 12 butterfly cakes you will need:

  • 250g of softened butter (these are not skinny cakes!)
  • 100g of caster sugar
  • 100g of self raising flour
  • 150g of icing sugar
  • 1 level teaspoon of baking powder
  • 2 large eggs
1. Pre heat the oven to 200 degrees (Fan 180 degrees) or Gas Mark 6.  Place the fairy cake cases in a 12 hole bun tin to keep a good even shape as they bake.

2.Whilst the oven is pre-heating, mix 100g of the softened butter with the caster sugar, self raising flour, baking powder and eggs in a bowl.  Beat the mixture until it is smooth and well blended...you can either do this the hard way and beat it by hand like I did or do it the easy way use your magi-mix or equivalent.  Add two teaspoons of the mixture into each mold.  I gently tapped the bottom of the case against the worktop to distribute the mixture more evenly.


 3. Bake the cakes in the oven for 15 -20 minutes (mine take about 17-18 minutes but all ovens vary) until they are well risen and golden brown.  Once cooked lift the cases out of the tin and place on a wire cooling rack (but leave them in the cases).


 4. While the cakes are cooling, make your butter icing.  Combine the rest of the butter with the icing sugar in a bowl and mix well...don't worry if it all looks a bit lumpy at first it will get smooth!


5. Once the cakes are cooled, cut a circle out of the centre of the cake to make a hole in the middle - I like to make quite a deep hole so that you get more butter icing! Cut the circle that you take out of the cake in half and keep to one side.  Fill each hole with the butter icing - either pipe it in or spoon it in.  Place two of the half slices on the top of each cake to make the wings and dust with a little icing sugar to finish.


The eagle-eyed amongst you will notice that they are less cakes on the plate than were on the tray..that's because we ate a few before I remembered I needed to take a picture!! Yummy! 

Wednesday, 30 November 2011

Thai inspired noodle soup

I LOVE Thai food!! Although I've only started eating it in the last two years...what a shame I didn't discover all the beautiful flavour combinations earlier! This recipe is Thai inspired and is based on a Nigel Slater recipe from his simple suppers collection..and it's exactly that..simple!  It's warming and comforting and if you use reduced fat coconut milk..not totally fattening either! 

The recipe below serves 2 people.  To make the Thai inspired soup you'll need:

  • 1 good knob of fresh root ginger, peeled and roughly chopped
  • 1-2 red chillies, seeds removed (optional), roughly chopped
  • 2-3 garlic cloves, peeled
  • 1-2 stalks of lemongrass (tough outer layers removed), roughly chopped
  • 1 handful fresh coriander, a few sprigs reserved and chopped
  • 1 teaspoon ground turmeric
  • 1 can coconut milk
  • 1/2 lime
  • 1 vegetable stock cube
  • prawns 
  • Rice noodles (or if you cant get them use fine egg noodles)
  • oil for frying

Firstly blend the ginger, chilli, lemongrass, garlic and coriander in a food processor.  Alternatively if you are like me and have left your food processor 105 miles away until you move into your new house permanently then you can use the jars or tubes of already ground up chilli/lemongrass/ginger paste, grate your garlic cloves and finely chop your coriander. It works just as well.  I used a generous teaspoon of the lemongrass, ginger and chilli pastes and stuck with the amounts above for the garlic and coriander.  Either way, add your "paste" to the pan with a little bit of oil and cook for a few minutes to release the aromas. Mmmmmmmm!!!!

Next, add the juice of half a lime, the turmeric and some vegetable stock.  Nigel recommends a "small jug"...me, I didn't have a measuring jug or a kettle (again 105 miles away!) so I boiled a little water in a pan and added the stock cube.  I would estimate I probably added about 300ml of stock.  What is a "small jug" anyway? I like Nigel's style of cooking..no set measurements, just a bit of a guess, go with it and make it to your taste..I suppose that's what makes it simple, not having to measure everything out perfectly.  Anyway, I digress... simmer the stock/paste mixture for a few minutes.

Whilst the stock/paste mixture is bubbling away put your noodles on to cook.  Add a can of coconut milk to the stock/paste mix and bring back to the boil, then reduce the heat and simmer it for a few minutes.  Once it has simmered away for a few minutes, add your prawns (if cooking from raw then to cook for a few minutes, or to reheat if you have bought pre-cooked ones.  I prefer raw ones, but hey sometimes you cant always get them so go with what you prefer/have to hand)


When the noodles are cooked, drain them and add them to a couple of nice deep bowls and ladle the soup/prawns over them and serve straightaway.  I added a little extra coriander to the top of mine too.  Nigel says that this recipe also works well with chicken, scallops or mushrooms as an alternative to prawns.  Whatever you choose to put in it, it's flippin' tasty! It's like a great big hug in a bowl and all in under 20 minutes, perfect!


Sunday, 15 May 2011

Homemade Pepperoni Pizza

Ok...so that's not entirely true since I used a pizza base mix but if someone is going to make my life easier and measure out all the ingredients for me then i am not going to argue with that.  It is homemade in the sense that it is not from the shops or the takeaway so you have greater control of what goes on the pizza. 

I came across this recipe in this month's Weight Watchers magazine.  My other half's instant reaction when I told him I was making pizza was ooh, then I told him it was a Weight Watchers recipe and he looked disappointed.  He soon ate his words though as it was delicious and I would definitely make this again.  It's ready in the time that it takes for one to be delivered and the pizza base mix was really cheap.  The only thing I would do differently is leave it in a little bit longer as it was a bit doughy in the middle - but then I find that even shop bought ones are.  I have got to get myself one of those pizza stones that I have been told makes all of the base crispy not just the sides.

The recipe in the magazine was for a sausage pizza but I decided to make a pepperoni pizza instead.  It was the same number of points - 8 pro points per slice.  The recipe serves four with a nice salad on the side.  The good thing about making your own pizza though - have whatever you want on it.  Obviously a veggie pizza is going to be less points per slice.

To make the pizza you will need:
  • 1 packet of pizza base mix (found in the home baking aisle in the supermarket)
  • 2 tablespoons of tomato paste (i used sacla intense sundried tomato paste)
  • 1 shallott, sliced
  • 9 large slices pepperoni
  • 1/4 tub roasted peppers (from the deli)
  • 2 medium tomatoes on the vine, sliced
  • 1 pack of half fat mozzerella, torn into chunks 
  • Pepper
  • Dried Parsley
  • Calorie Controlled cooking spray
  • Plain Flour
Pre-heat your oven to Gas Mark 7 or 220 degrees.  Prepare the pizza base as per the instructions on the back of the pack - in my case it was adding hot water from the tap and kneeding it.  Roll out the dough on a floured surface until its thin like how you imagine a thin crust pizza base would be before its cooked.


Spray a baking tray with calorie controlled spray and then dust it with a little flour so that the pizza base doesnt stick.  Now here is the tricky bit - transfer the dough from your work surface to the tray.  I had to do this twice as it looked a right mess the first time i did it, so I squished it all up and rolled it out again.  Once on the baking tray, turn the edges up a little to create a sort of crust.


The instructions on the back of my packet of pizza mix told me to leave it somewhere warm for ten minutes, so i left it on top of the hob while the oven was pre-heating.  Not sure what it was supposed to do as it didn't seem to rise or anything, but i guess there was a reason for it.

Spoon the paste onto the pizza base and spread it out into a thin layer leaving a little gap around the edge.  Add your toppings.  Season with pepper and sprinkle some dried parsley over the top (as much as you like, I probably used a teaspoon).  Alternatively you could sprinkle over some basil.


Put the pizza in the oven for 15-20 minutes until the base is crispy and golden and serve with some salad. How good does that look!? Delicious!


Friday, 6 May 2011

Tomato and Onion Salad

This delicious Tomato and Onion salad goes really well with the chicken tikka kebabs in the previous post, but its also easy to increase the quantities and serve this as a side dish at a BBQ.  It's also very refreshing.

The recipe below makes enough for two people and with only 1 pro point - leave the olive oil out and its completely free.

To make the tomato and onion salad you'll need:
  • 5 medium size tomatoes
  • half a red onion, sliced into thin strips
  • 1 tablespoon white wine vinegar
  • 1 teaspoon olive oil
  • 1 tablespoon fresh mint, chopped
  • 1 teaspoon dried parsley
  • Salt and Pepper
In a bowl add the sliced onion and the white wine vinegar.  Leave the onion to soften for around 15 minutes.


Chop up the tomatoes and add to the onion.  Add the olive oil, mint, parsley and seasoning and stir together. 


Chicken Tikka Kebabs

These kebabs are so easy to make and don't take long at all to make, which is great when you don't have a lot of time or you've had a long day at work and want something quick and simple for tea.  These would also be great for BBQ's in the coming months, if the weather in the UK holds out!

The recipe below serves two people but its very easy to increase the quantities if you are serving a lot of people - it works out as 1 chicken breast per person.  If you are following weight watchers it works out as 14 pro points for the whole recipe or 7 pro points each.  Serve it with a 0 point salad and if you have some points to spare, why not add some tasty flatbread or a pitta bread.

To make the kebabs for two people you will need:
  • 2 medium skinless chicken breasts, cut into chunks
  • 1 tablespoon curry paste - I used tikka masala but use whatever type you fancy
  • 2 tablespoons half fat creme fraiche or Greek yoghurt
  • Metal skewers
In a bowl, mix together the curry paste and the creme fraiche or Greek yoghurt, whichever you have decided to use.  Add the chunks of chicken and marinate for about 5 minutes.


Thread the chicken onto metal skewers - there should be enough chicken to make two generous skewers or three normal ones.  Place the skewers onto a baking tray.


Place the skewers under a medium grill and cook for 5 minutes on each side. Alternatively put them on the BBQ and cook for the same time.  If the marinade on the skewers looks like it is drying out or like there isn't enough, use some of the leftover marinade to spread over the chicken.  


Serve with mixed salad leaves and this delicious tomato and onion salad.  


Tuesday, 3 May 2011

Warm smoked salmon salad with mint, chilli and lime dressing

The weather in the UK has been lovely over the last couple of weeks.  When the sun comes out I tend to loose my appetite and when I do want something to eat its usually something light like a salad.  I have had some requests for some lighter dishes now that we have some nicer weather, and this is a perfect example of something light but is it a bit more interesting than your bog standard garden salad.  You could have this as a starter between a few people, a main dish for two or up the quantities a little and serve it as a salad option at a BBQ.  Asparagus is in season at the moment and it tastes delicious in this dish!

The recipe below is for 2 people as a main dish.  For those following weight watchers this salad is 9 pro points per serving including the dressing.

For the salad you'll need:
  • 2 smoked salmon fillets
  • 6 new potatoes
  • handful of green beans
  • 10 asparagus spears
  • 8 cherry tomatoes, halved
  • 1 pack of mixed salad leaves
  • 2 spring onions
  • Fresh Parsley
  • Fresh Mint
For the dressing you'll need:
  •  1 tablespoon of sweet chilli sauce
  •  Juice of half a lime
  • 1/2 tablespoon of olive oil
Bring a pan of water to the boil and cook your potatoes for 15 minutes, until tender.  Meanwhile follow the instructions on the pack of smoked salmon fillets and warm them through in the oven.


While the potatoes are cooking take a large dish or bowl and add your salad leaves, spring onions and tomatoes.  Chop up a tablespoon of mint and a teaspoon of parsley.  Put all of the parsley and half of the mint into the salad.  Just before the potatoes are cooked add the green beans and asparagus tips to the pan and cook for two minutes.  Drain and set to one side to cool a little.  The salmon should be warmed through by this point

Once cooled a little, slice the potatoes in half or three depending on how big the potatoes are and add them to the salad along with the green beans and asparagus spears.  Take the salmon and using your fingers, flake the salmon all over the salad in nice bite sized chunks.  Using salad tongs (or a normal fork and spoon work perfectly well) toss the salad together so everything is mixed well.

In a small bowl, add the olive oil, sweet chilli sauce, lime juice and the rest of the mint and mix together.  You can see from the picture below that it doesn't look like much dressing but you don't want lots otherwise it will overtake the gorgeous flavour of the smoked salmon, instead it just compliments it. Spoon over the salad and serve.


Absolutely delicious!!  


Monday, 25 April 2011

Meatball Pasta Bake

Well it's been a while, but the madness of work has settled down and I've actually found time to update the blog.  As you know from previous blog posts, about a month and a half ago I started on Weight Watchers, and very successful it has been too.  To date I am one pound shy of having lost a stone and have lost 5% of my body weight...go me!

The weight loss success has been in part, down to a couple of weight watchers cookbooks that I have.  My mum bought me "Weight Watchers Book of Recipes" and then I bought the "Weight Watchers Seriously Satisfying" cookbook.  This meatball pasta bake recipe comes from the Seriously Satisfying book.  I was quite pleased and surprised to find that this recipe only had 10 ProPoints per serving - normally pasta dishes are quite high especially if they have beef in them!  

I often find that living with someone who isn't on a diet can be quite hard - sometimes you see a recipe that looks tasty but you know that the other person wont eat it (usually because it lacks meat..eat a vegetarian dish you say..never!), so you either end up making two meals or cooking something else entirely.  I don't have any children but I can imagine it's the same difficulty, so this dish is great because the whole family can enjoy it.

The recipe below serves 4 and you will need:
  • 400g (or 14oz) of extra lean beef mince
  • 1 large onion, finely chopped
  • 1 tablespoon dried parsley
  • 1 teaspoon dried basil
  • calorie controlled cooking spray
  • 175g (or 6oz) dried penne pasta
  • 2 x 400g tins of tomatoes
  • 2 teaspoons tomato ketchup
  • 2 garlic cloves
  • 1 teaspoon balsamic vinegar
  • 125g pack light mozzarella, drained and torn into chunks
  • Salt and Pepper
In a large bowl mix together the mince, some of the onion, parsley, basil and a little bit of the garlic.  Add some seasoning and then shape into walnut sized balls.  You should get around 16 balls, depending on how big or small you make them.


Spray a non stick frying pan with the cooking spray and heat until hot.  Add the meatballs and cook for 7 to 8 minutes until browned all over.  Don't worry if they aren't cooked all the way through as they will continue to cook when they are in the oven.  Once sealed, remove from the pan and set to one side.

Bring a pan of water up to boil and add your pasta, cooking as per the instructions.  Meanwhile, in the same pan you used to sear the meatballs, add the rest of the onion and fry gently for a couple of minutes.  Add the chopped tomatoes, ketchup, balsamic vinegar and the rest of the garlic. Season with a little salt and pepper and leave to cook for a few minutes until the flavours have chance to combine a little.
Once your pasta has cooked, drain it and add it to the sauce.  Add the meatballs into the frying pan and stir it together - I found this the easiest way to do it rather than trying to mix it all in the ovenproof dish as it usually goes all over the place.  Transfer the sauce/meatball/pasta mix from the frying pan into the ovenproof dish.  Top the mixture with the torn mozzarella cheese and bake in the oven at 190 degrees/170 fan oven/gas mark 5 for 25 minutes until the cheese is bubbling.


Serve with some seasonal salad leaves

Sunday, 13 March 2011

Lamb and Feta burgers

With loads of changes going on recently, I have somewhat neglected the blog and been sticking to recipes I have made before, with little enthusiasm for making anything new.  But, I did manage to find some time to make some of these burgers.  I normally make my own burgers as they taste much nicer than shop bought or frozen ones but they are normally made from beef.  Then I came across these Lamb and Feta burgers on the Weight Watchers i-phone app, which I thought was a brilliant combination and don't know why I hadn't thought of it before since I really like Greek food.  The recipe below serves 4 (or 2 hungry people!) and each serving (with Tzatziki and pitta) is 11 pro points

To make the burgers you will need:
  • 500g lean lamb mince (125g per person)
  • 2 cloves garlic, crushed
  • 1 tablespoon mint
  • 1 tablespoon parsley
  • 1 onion, very finely chopped
  • Worcestershire Sauce
  • Salt and Pepper
  • 4 Pitta Bread (if you are on WW use WW wholemeal pitta breads)
  • 1 tablespoon shop bought Tzatziki (or make your own if you can be bothered)
  • 85g Feta Cheese, crumbled
In a large mixing bowl, add the lamb, onion, garlic, mint, parsley and feta.  Add a dash of Worcestershire sauce and season with a little salt and pepper.  Mix everything together - get  your hands in there and squish it all about!!


Once mixed together, separate the mixture into four equal pieces.  Take one piece and roll it into a ball, then flatten it out between your hands into a burger shape.  Repeat with the other 3 pieces.


Place the burgers on a baking tray and set to one side.  Place your pitta bread under a medium grill to warm through for a couple of minutes.  Remove from the grill and place the burgers under for around 10 minutes - turning after 5 minutes.


Once cooked, cut each burger in half and serve 2 halves in a pitta bread (it fits better that way!)with whatever salad you fancy and a tablespoon of Tzatziki.  Yum!! 


Sunday, 27 February 2011

Mum's Spaghetti Bolognaise

As my last post was about a dish I first made when I was young, I thought I would blog about the other dish that I first learnt to cook when I was younger - my mum's spaghetti bolognaise.  It was also the very first dish I cooked for my other half and he has been hooked on it ever since.  Everyone I know has a slightly different way of making bolognaise but my mum is a great cook and her bolognaise is delicious so this is my favourite method!

To make this dish for 2 people you'll need:
  • 250g lean mince beef
  • 6 button mushrooms, sliced
  • 1 onion, diced
  • 1/2 red pepper, diced - optional (I used it on this occasion as I had one that needed using up)
  • 1 400g tin cherry tomatoes (or chopped tomatoes)
  • 1 garlic clove, crushed
  • 1 tablespoon tomato paste
  • 1 tablespoon Tomato Ketchup
  • 1 teaspoon Worcestershire Sauce
  • 1 teaspoon Balsamic Vinegar
  • 1 teaspoon dried parsley (or fresh if you have it)
  • 1 teaspoon dried basil (or fresh if you have it)
  • 1 Beef Oxo cube
  • 1 teaspoon olive oil
  • Salt and Pepper
In a frying pan add the olive oil, onions, peppers and mushrooms. Fry gently over a low heat until softened. 

Add the mince and fry until brown.  Once brown, crumble a beef oxo cube over the mince and the vegetables and mix together.


Add the tinned tomatoes, ketchup, tomato paste, garlic, Worcestershire sauce, balsamic vinegar, basil and parsley.  Mix together and then season with salt and pepper. 

Simmer over a low heat for around 15-20 minutes, stirring occasionally until the sauce has thickened and reduced a little.  Check for seasoning and then serve with some pasta of your choice.


Friday, 25 February 2011

Stuffed Peppers

I have made these stuffed peppers since I was about 15.  Even back then I would see somebody make something or come across a recipe and adapt it to my own tastes.  This particular dish was from Delia Smith but she added anchovies to hers which, at the time I thought was pretty disgusting.  Now I wouldn't mind giving that a go! You can have this as a vegetarian main dish (both peppers) with some lovely salad or you can have it as a starter or as a healthy side to your main meal.  If you are following Weight Watchers this only has 4 points per pepper. 

To make 2 stuffed peppers you will need:

  • 1 sweet pointed pepper (make sure you choose nice big ones rather than skinny flat ones so you can get more tomatoes in them) 
  • An assortment of cherry or plum tomatoes (I used red, orange and yellow)
  • 2 tablespoons balsamic vinegar
  • 2 teaspoons olive oil (you could substitute this for fry light and save yourself a point)
  • 1 clove of garlic, crushed
  • 1 pack of half fat mozzarella, torn into pieces
  • Salt and Pepper
  • 1 teaspoon dried parsley
And here's what you do:

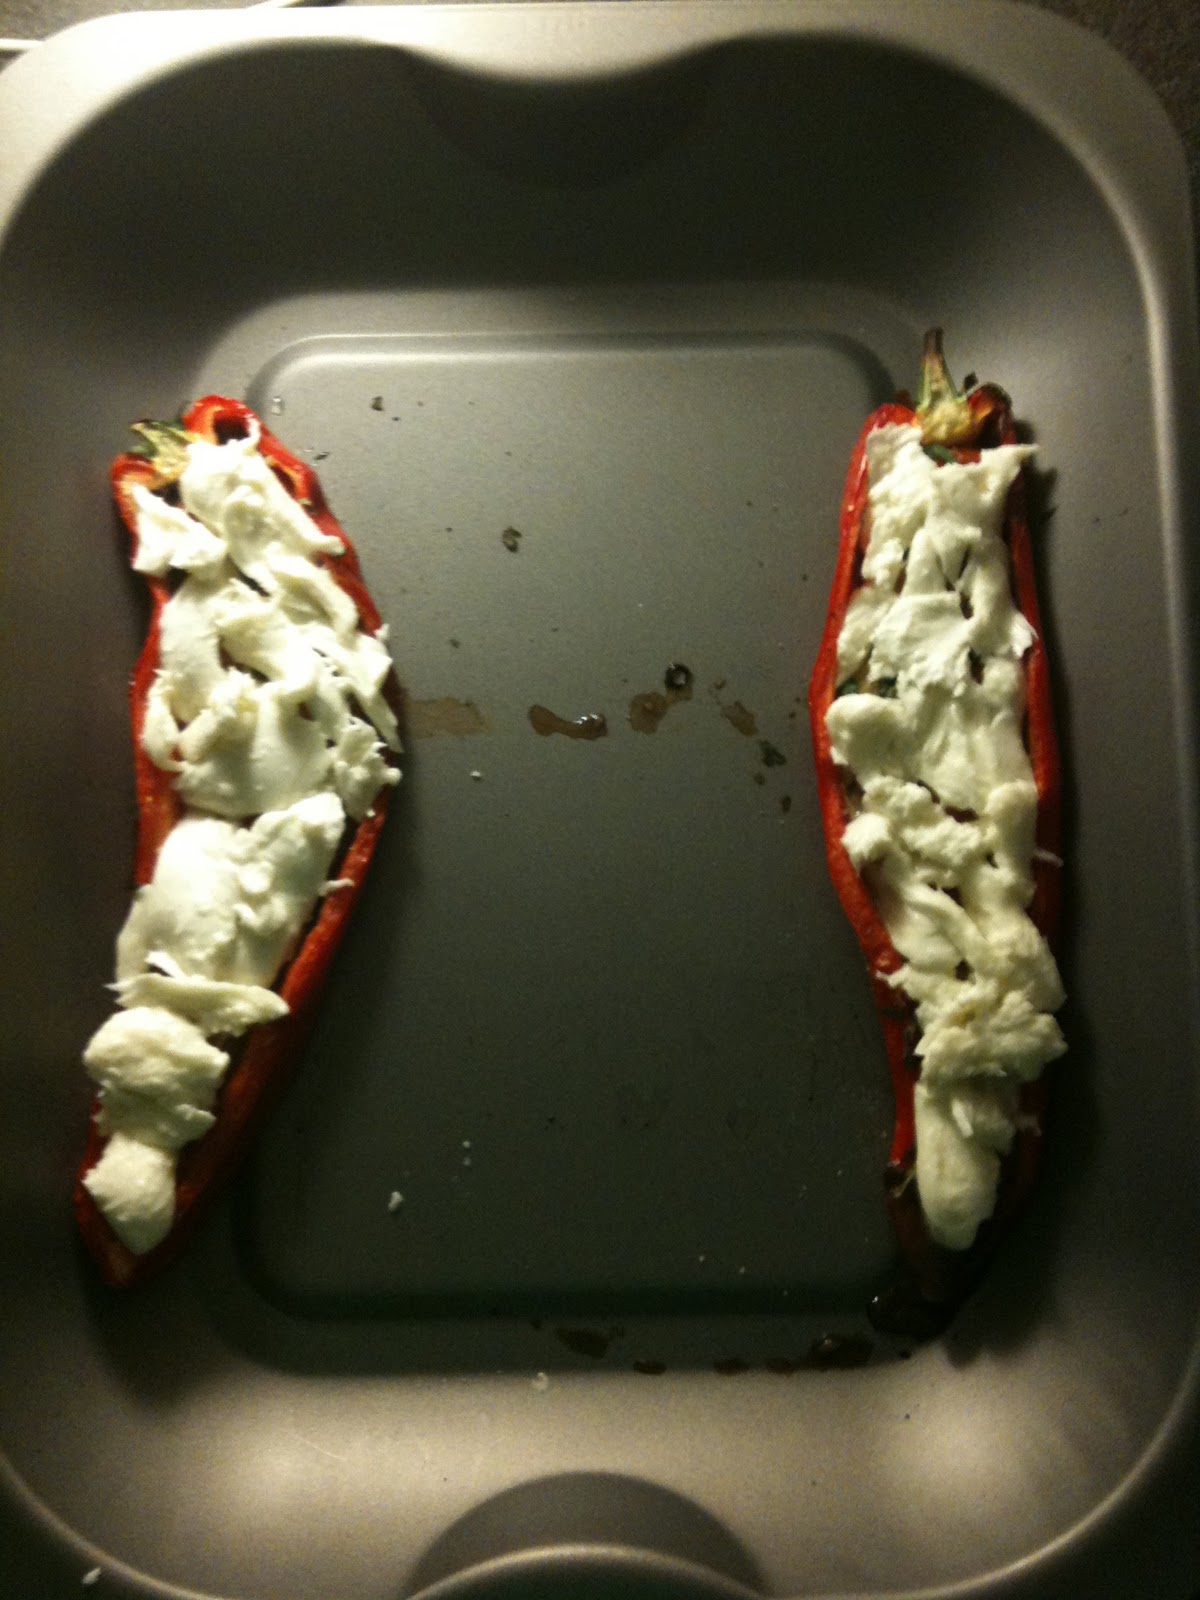
Cut the peppers in half length ways and de-seed them. Put the peppers in a baking tray - you might need to use a deep baking tray or dish to give some support to the peppers if they were a bit curvy like mine.   Pre-heat your oven to gas mark 6 or 200 degrees

Cut your cherry or plum tomatoes in half and put them inside the pepper, creating a layer of tomatoes.  Divide the garlic between the two peppers, spreading it across the tomatoes and in the gaps in between.  Then add a tablespoon of balsamic vinegar to each pepper so that the vinegar is in all the gaps between the tomatoes (my mouth is watering as I am writing this!). Drizzle a teaspoon of olive oil on each pepper, season, sprinkle a little dried parsley over each and pop in the oven for around 15-20 minutes until the pepper and tomatoes have softened.

Remove the peppers from the oven and top with the torn mozerella.  Put back in the oven to cook for around 10 minutes until the cheese is melted and starting to bubble. 


A delicious yet healthy dish which tastes great and is really versatile...what more can you want?


Related Posts Plugin for WordPress, Blogger...